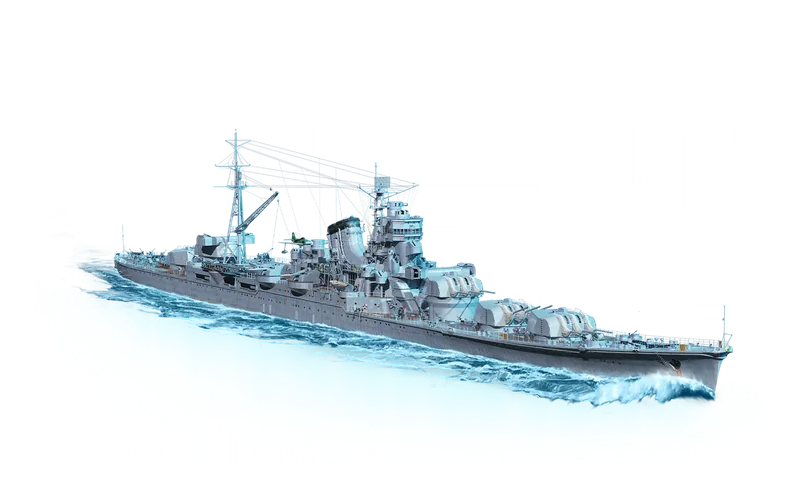
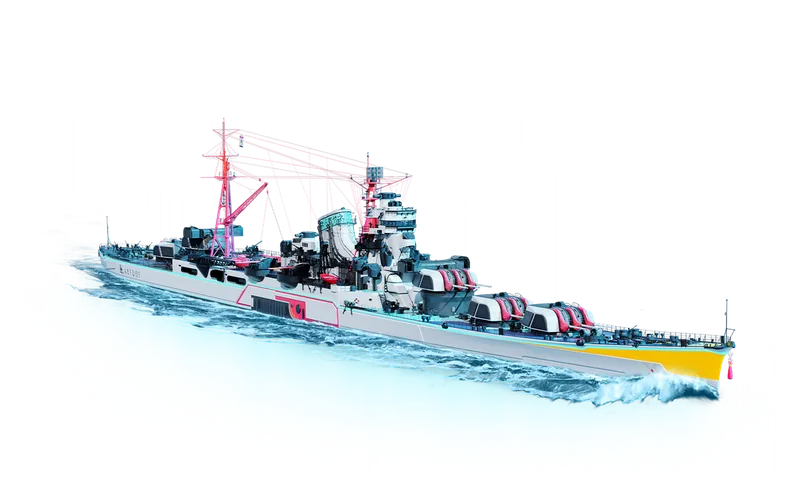
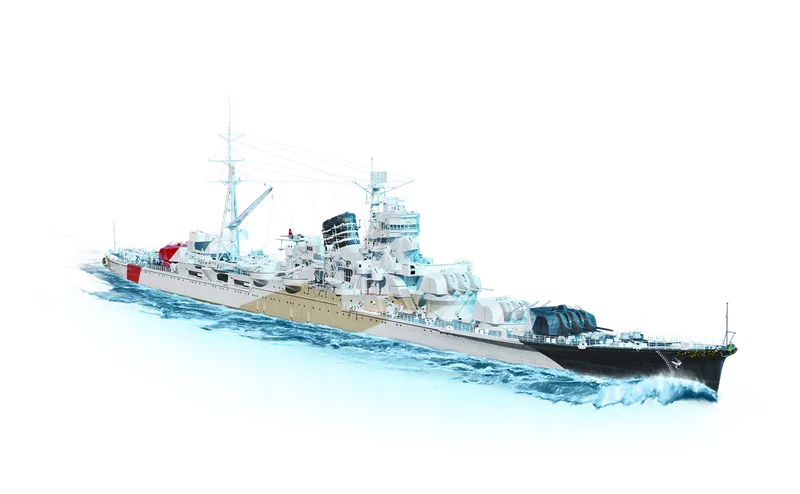
Hit PointsInitial: 43,400 → 49,500
Displacement21,270 t
Hull dimensions ƒ
Length x beam at the waterline, with the hull's draft where the client carries one. Ships whose client entry holds only the 260 x 20 m placeholder use a curated real-world figure instead, and any ship we have no trustworthy size for omits this row rather than print the placeholder. Length matters when dodging torpedoes; beam and draft shape how hard the ship is to hit.
Armor range13–160 mm
Plate armor thicknesses13, 25, 27, 32, 33, 40, 50, 60, 65, 90, 100, 105, 150, 160 mm
Armor material/layer entries63
Fire resistance ƒ
Does not reduce the damage a burning fire does per second: replay-measured burn ticks run at the full rate on every ship. By elimination it lowers how often hits set you on fire; ignition-rate replay data is consistent with that but too confounded by attacker mix to measure the reduction directly.
Fire duration30 s
Fire damage ƒ
Each fire ticks 0.3% of max HP per second for the full 30 s, so one unattended fire burns 9% of the pool (4,455 HP on this ship). 4 fire points can burn at once. Verified against measured burn ticks in replay data.
Flood duration40 s
Flood damage ƒ
A flood ticks 0.25% of max HP per second for the 40 s duration, so one unattended flood costs 10% of the pool (4,950 HP on this ship). Verified against measured flood ticks in replay data.
Torp Reduction ƒ
Reduces torpedo hit damage. Replay data shows no effect on floods: flood ticks run at the full rate and flood frequency does not decline with protection.
Magazine HP ƒ
Per-turret powder-magazine HP, a separate pool from the ship's. Penetrating hits wear it down and the turret is likelier to be knocked out as it falls, so a larger pool keeps the guns firing through punishment that silences a peer's.
Steering gear HP ƒ
Durability of the steering gears. As this pool drops, hits are likelier to jam the rudder; unlike most modules the steering can be knocked out and repaired but is never permanently destroyed.
Effective HP ƒ
Base 49,500 HP plus everything Repair Party can restore: 0.5%/s x 28 s = 6,930 HP per charge, x2 charges = 13,860 HP. Ceiling, not a prediction: a charge only restores damage actually taken, and only the regeneratable share of it. Across 1,826 players in our replay corpus the median ship realized about half of this, mostly because half the charges go unspent, and when Repair Party IS pressed it returns ~97% of the per-charge figure above.
Repairable: penetration50%
Repairable: citadel33%
Repairable: steering gear50%
These main guns are dual-purpose: they also fire at aircraft and feed the AA Defense card.
ModuleArtillery: 150 mm/60 5th Year Type
Mounts / barrels5 mounts / 15 barrels
Reload time15 s
Firing range (base)13.9 km
Firing range (top fire control)15.3 km
Turret traverse30 °/s
Turret armor32 mm
Turret traverse arcs ƒ
How far each mount can train, in degrees to either side of the mount's own facing, read from in-game data. A rear turret with ±150° leaves a 60° blind wedge over the bow; one-sided arcs are wing mounts that cover a single side. The data does not say which way each mount faces, so the arcs are listed per mount without bow/stern angles.
Guns to bear ƒ
How far off the bow (or stern) the ship must angle before every main turret can fire: the widest blind wedge among the rear-facing (or forward-facing) mounts, from each mount's trainable arc. Mount facing is inferred from turret stations and verified against known layouts, including Izumo's aft-facing forward turret.
AP pen max range74 mm
HE fire DPM vs T8 BB49183
Effective HE DPM vs T8 BB208183
Shell Grouping (σ)2.05
Max Horiz Disp ƒ
Horizontal dispersion ellipse width at max range, from the verified WoWS dispersion model:
Max Vert Disp ƒ
Vertical dispersion ellipse height at max range:
Med Horiz Disp ƒ
50%-hit horizontal radius:
Med Vert Disp ƒ
50%-hit vertical radius:
Turret turn time ƒ
180 degrees / 30 deg/s traverse speed = 6 s.
Shells/min ƒ
Zero upgrades: 15 broadside guns x 60 / 15 s base reload = 60. All upgrades (Main Battery Mod. 3 = -10% reload): 15 broadside guns x 60 / 13.5 s all-upgrades reload = 66.7.
HE shells
HE Damage2,650
HE Velocity930 m/s
Fire Chance10%
HE penetration ƒ
In-game data: 30 mm = 150 mm caliber / 5 (non-standard HE penetration ratio).
HE full-salvo alpha ƒ
2,650 HE damage x 15 broadside guns = 39,750.
HE DPM ƒ
Zero upgrades: 39,750 HE full-salvo alpha x 60 / 15 s base reload = 159,000. All upgrades (Main Battery Mod. 3 = -10% reload): 39,750 HE full-salvo alpha x 60 / 13.5 s all-upgrades reload = 176,667.
Fires/min ƒ
Zero upgrades: 60 shells/min x 10% fire chance = 6. All upgrades (Main Battery Mod. 3 = -10% reload): 66.7 shells/min x 10% fire chance = 6.67.
AP shells
AP Damage3,100
AP Velocity930 m/s
Min Ricochet45 deg
Guaranteed Ricochet60 deg
Fuse Timer0.025 s
Fuse Threshold25 mm
AP overmatch ƒ
floor(150 mm caliber / 14.3) = 10 mm (AP auto-penetrates plating this thick or less).
AP Pen Close ƒ
Canonical community AP formula (jcw780/wows_shell), evaluated at muzzle velocity: . Matches the in-game spec card.
AP Pen Far ƒ
Same formula at the ship's max firing range (15.3 km), where the shell has slowed to 341 m/s: .
AP full-salvo alpha ƒ
3,100 AP damage x 15 broadside guns = 46,500.
AP DPM ƒ
Zero upgrades: 46,500 AP full-salvo alpha x 60 / 15 s base reload = 186,000. All upgrades (Main Battery Mod. 3 = -10% reload): 46,500 AP full-salvo alpha x 60 / 13.5 s all-upgrades reload = 206,667.
AP AOE Radius ƒ
AP shell over-penetration splash radius; scales with shell mass. Wickes 102mm = 3, standard 152mm CL ~ 20, Iowa 406mm ~ 270, Yamato 460mm = 400, Incomparable 650mm = 550 (max). Larger value = bigger splash damage area when AP over-pens.
ModuleTorpedoes: 610 mm quadruple
Launchers / tubes4 launchers × 4 tubes = 16 tubes
Reload time ƒ
Base reload of the top torpedo module (all-upgrades configuration); the stock module reloads in 130 s. In-game port tooltips additionally fold in your installed modernizations and commander effects - e.g. Torpedo Launchers Mod. 3 alone is x0.85: s.
Projectile speed57 kt
Range14.49 km
Maximum simulated damage ƒ
Estimate of WG's in-game value; matches the in-game port screen within ±5%. Saturation: most targets only intersect one hull section, so the sim transfers ~1/3 of the warhead alpha (2/3 when the warhead blast >= 5000 and the burst reaches a second section). For this ship: .
Maximum damage (ammunition) ƒ
The ammunition card's 'Maximum Damage' stat, exact: warhead alpha / 3 plus the blast addend. This is the per-torpedo number most references quote; the 'Maximum simulated damage' row above is WG's separate geometry-sim stat from the launcher spec panel.
Torpedo detectability1.7 km
Reaction time ƒ
How long a target has to dodge after your torpedo is spotted at its detectability range (lower means less warning): . The 2.6855 m/s-per-knot game-speed factor is calibrated from in-game measurement; the community's traditional 2.6 reads about 3% slower. Base value; commander torpedo-concealment skills lower it further. Community torpedo-reaction calculator by u/LorenDovah and u/The_ColorOutofSpace.
Flooding chance ƒ
Read straight from the game's own data: this torpedo carries a flooding-chance value of 3.55 per hit, shown as . Torpedo flood values above 100% are normal: in battle the base chance is scaled down by the target's torpedo protection (the Torp Reduction stat on its Survivability card) and any flood-resistance modifiers, so a value above 100% keeps flooding likely even through partial protection. Not shown on the in-game port screen.
Torpedo launcher traverse25 °/s
Launch arcs106° per side
Torp Turn ƒ
Time to rotate the launchers 180 deg: .
Torp Arming183 m
Per-side salvo damage ƒ
One side firing, all torpedoes hitting: per-side tubes x per-torpedo simulated damage = 8 x 19,567 = 156,536.
AA mount pointsInitial: 26 → 32
Maximum AA range ƒ
Longest-reaching family on the in-game AA card. Base AirDefense aura max range is 3.1 km; dual-purpose mount auras extend it.
40 mm/60 Type 5 (upgraded hull only)6×2 40mm
25 mm/60 Type96 mod. 116×1 25mm
25 mm/60 Type 9610×3 25mm
100 mm Type98 (DP) ƒ
Dual-purpose: your secondaries doing double duty against aircraft. The same mounts appear on the Secondary Battery card - shared guns, not extra hardware.
Gunsmain battery (DP)
Continuous DPS ƒ
Effective DPS in in-game units (raw aura damage × 3.5 × hit probability, summed per contributing aura) - matches the Close-range AA DPS headline's currency. Includes 88 from dual-purpose main battery firing as AA in this range band.
Range6 km
Guns100 mm Type98 (DP)
Continuous DPS ƒ
Effective DPS in in-game units (raw aura damage × 3.5 × hit probability, summed per contributing aura) - matches the Close-range AA DPS headline's currency. Includes 94 from dual-purpose secondaries firing as AA in this range band.
Range5 km
Total DPS in Aura ƒ
Zone 1 Far 88 + Zone 2 Far 94 = 182
Guns40 mm/60 Type 5
Continuous DPS ƒ
Effective DPS: 46 raw aura damage × 3.5 × 0.9 hit probability = 145 - the same in-game units as the Close-range AA DPS headline.
Range3.5 km
Total DPS in Aura ƒ
Zone 1 Far 88 + Zone 2 Far 94 + Zone 3 Far 145 = 327
Guns25 mm/60 Type96 mod. 1
Continuous DPS ƒ
Effective DPS: 14 raw aura damage × 3.5 × 0.9 hit probability = 44 - the same in-game units as the Close-range AA DPS headline.
Range3.1 km
Total DPS in Aura ƒ
Zone 1 Far 88 + Zone 2 Far 94 + Zone 3 Far 145 + Medium 44 = 371
Guns25 mm/60 Type 96
Continuous DPS ƒ
Effective DPS: 19 raw aura damage × 3.5 × 0.85 hit probability = 57 - the same in-game units as the Close-range AA DPS headline.
Range2.5 km
Total DPS in Aura ƒ
Zone 1 Far 88 + Zone 2 Far 94 + Zone 3 Far 145 + Medium 44 + Near 57 = 428
Bursts ƒ
Each ~2 s wave fires 2 quick salvos of 2 clouds ahead of the attacking squadron, plus 1 stray cloud farther out that appear off-beat between waves - up to 5 clouds per wave × 250 damage each. Planes that fly into a cloud take its damage; clouds dissipate before the next wave lands. Defensive AA Fire, where fitted, multiplies the salvo repeats within each wave.
Cloud damage ƒ
Damage a plane takes for flying into one flak cloud, before any reductions.
Cloud spawn chance ƒ
Each cloud in the pattern rolls this chance to spawn, so waves average fewer clouds than the maximum. Often called flak 'hit chance', but spawned clouds always damage planes that fly into them - the roll is on spawning.
Wave rate ƒ
A flak wave spawns roughly every 2 s - timed frame-by-frame from gameplay footage and consistent across ships.
Fired by ƒ
Flak keeps firing while at least one main battery mount is operational - even losing every other AA mount does not stop it.
Flak zone ƒ
The activation band: flak fires while attacking planes are inside it. Clouds are placed ahead of the planes' path, so bursts can land short of 2.5 km or past 6 km - once planes get inside the band, new waves stop. AA range bonuses push the outer edge out; the 2.5 km inner edge does not move.
Bursts ƒ
Each ~2 s wave fires 2 quick salvos of 2 clouds ahead of the attacking squadron, plus 1 stray cloud farther out that appear off-beat between waves - up to 5 clouds per wave × 250 damage each. Planes that fly into a cloud take its damage; clouds dissipate before the next wave lands. Defensive AA Fire, where fitted, multiplies the salvo repeats within each wave.
Cloud damage ƒ
Damage a plane takes for flying into one flak cloud, before any reductions.
Cloud spawn chance ƒ
Each cloud in the pattern rolls this chance to spawn, so waves average fewer clouds than the maximum. Often called flak 'hit chance', but spawned clouds always damage planes that fly into them - the roll is on spawning.
Wave rate ƒ
A flak wave spawns roughly every 2 s - timed frame-by-frame from gameplay footage and consistent across ships.
Fired by ƒ
Flak keeps firing while at least one secondary battery mount is operational - even losing every other AA mount does not stop it.
Flak zone ƒ
The activation band: flak fires while attacking planes are inside it. Clouds are placed ahead of the planes' path, so bursts can land short of 2.5 km or past 5 km - once planes get inside the band, new waves stop. AA range bonuses push the outer edge out; the 2.5 km inner edge does not move.
Mounts4
Firing range5.0 km
Shell Grouping (σ)1
100 mm Type98 (DP) ƒ
Dual-purpose: the same mounts also fire at aircraft, so they appear on the AA Defense card too - shared guns, not extra hardware.
Caliber100 mm
Reload time2.86 s
HE Damage1,700
Muzzle Velocity1000 m/s
Fire Chance6%
HE Pen17 mm
Secondary dispersion type ƒ
Max dispersion = range (km) × 57 + 30. Each dispersion type sets its own slope; this is not a percentage applied to a standard baseline.
Max secondary dispersion @ 5 km ƒ
5 km × 57 + 30 = 315 m.

Maneuverability
Engine power152,000 hp
Maximum speed34.5 kt
Turning circle radius860 m
Rudder shift time8.5 s
Engine power-boost threshold7 kt
Engine spool-up time15.3 s
Reverse spool-up time7.7 s
Reverse speed ƒ
top speed / 4 + 4.9 = 34.5 / 4 + 4.9 = 13.5 kt. The community reverse-speed model from the WoWs ShipBuilder project, the same source as the acceleration model on this card. Base value; speed modifiers scale it. Not shown on the in-game card.
Crash stop ƒ
Seconds from top speed to a dead stop after ordering full reverse: reverse power winds in over the reverse spool-up while water drag does most of the braking. Same community-model simulation as the acceleration times, using the ship's own reverse-power ratio from in-game data. The full curve is on the acceleration chart.
Engine boost threshold (reverse) ƒ
Speed below which the engine's built-in power boost applies in reverse. Matches the in-game maneuverability card's reverse threshold (Vampire II reads 10.5 here and the card shows 11; the card rounds half up).
Acceleration 0-90% ƒ
Time to reach 90% of top speed (31.1 kt of 34.5 kt), from our in-house acceleration model.
Acceleration 0-99% ƒ
Time to reach 99% of top speed (34.2 kt of 34.5 kt). 99% rather than 100% because true top speed is asymptotic (thrust meets drag), so the last fraction of a knot is never quite gained.
Traverse-to-turn ratio ƒ
How many degrees the turret can swing for each degree the hull turns. Turn rate , so . Below 5 the turrets drag in a turning fight; 25+ keeps up with any rudder.
Detectability by sea12.43 km
Detectability by air7.46 km
Smoke firing penalty6 km
Detect when firing (sea) ƒ
Equal to the ship's main battery range (never below base detectability): firing makes you visible to everyone you can reach. Matches the in-game 'Detect Firing Sea' value on all 8 unmodified captures, and range-modified captures track the modified range.
Detect when firing (air) ƒ
Air detectability plus the gun-firing bloom (3 km, which tracks main-battery caliber x 0.020). Matches the in-game 'Detect Firing Air' value on every captured ship.
Detect when on fire (sea) ƒ
Base sea detectability + 2.0 km while burning; matches the in-game 'Detect Fire Sea' value on every captured ship.
Detect when on fire (air) ƒ
Base air detectability + 3.0 km while burning; matches the in-game 'Detect Fire Air' value on every captured ship.
Guaranteed Detect2 km
 Damage Control Party∞ charges · 60 s reload · 5 s active
 Sonar4 charges · 90 s reload · 60 s active · 4.8 km ship detect
 ƒ
Derived from the consumable's 30 m grid-unit range (km = grid units x 30 / 1000): ƒ
Derived from the consumable's 30 m grid-unit range (km = grid units x 30 / 1000): Choose one
 Catapult Fighter3 charges · 80 s reload · 90 s active · 5 km patrol radius
 ƒ
Derived from the consumable's 30 m grid-unit range (km = grid units x 30 / 1000):  Defensive AA Fire3 charges · 140 s reload · 25 s active · ×2 flak burst boost
 ƒ
Repeats the flak burst pattern ×2 within each wave - more clouds in the air over the wave, at the same spots. Repair Party2 charges · 80 s reload · 28 s active · 6,930 HP (14% of max HP) total heal (per charge)
 ƒ
Heal per second (0.5%) x effective active time (28 s) = up to 14% of max HP restored per charge.ƒ
14% per charge x 2 charges = up to 28% of max HP if the whole Repair Party loadout is used.ƒ
0.5% of max HP (49,500 HP) per second = 248 HP/s. WoWS heals a flat percent of MAX HP each second, so this rate holds at any health level.