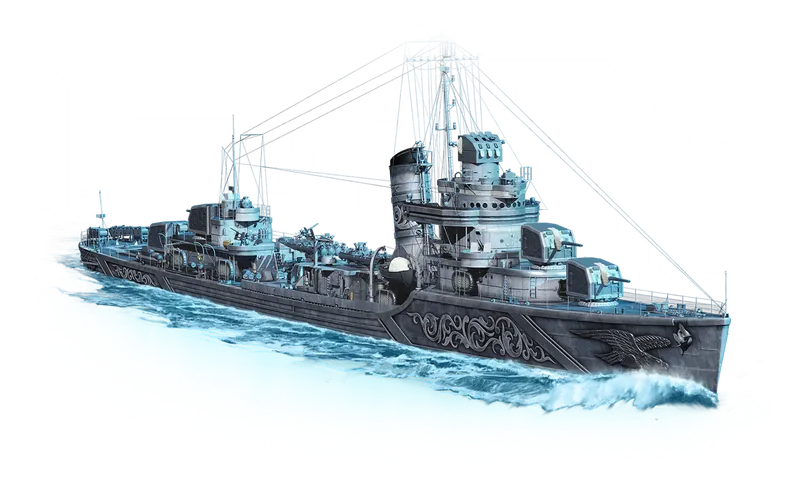
Hit PointsInitial: 14,900 → 17,000
Displacement2,293 t
Hull dimensions ƒ
Length x beam at the waterline, plus draft. Length matters when dodging torpedoes; beam and draft shape how hard the ship is to hit.
Armor range10–16 mm
Plate armor thicknesses10, 13, 15, 16 mm
Armor material/layer entries21
Fire resistance ƒ
stock hull: 1 − 0.7336 fire coefficient = 26.6%; top hull: 1 − 0.7003 fire coefficient = 30%. Lowers how often hits set you on fire. It does not reduce the damage a burning fire does per second; fires burn at the full rate on every ship.
Fire duration30 s
Fire damage ƒ
One unattended fire: 0.003 of max HP per second (0.3%) × 30 s = 0.09 of the pool; 0.09 × 17,000 HP = 1,530 HP on this ship. 4 fire points can burn at once.
Flood duration40 s
Flood damage ƒ
One unattended flood: 0.0025 of max HP per second (0.25%) × 40 s = 0.1 of the pool; 0.1 × 17,000 HP = 1,700 HP on this ship.
Torp Reduction ƒ
1 − 0.333 hull torpedo-damage coefficient / 0.333 unprotected baseline = 0%. Reduces torpedo hit damage. It does not affect flooding: floods start as often and tick at the full rate.
Steering gear HP ƒ
Durability of the steering gears. As this pool drops, hits are likelier to jam the rudder; unlike most modules the steering can be knocked out and repaired but is never permanently destroyed.
Repairable: penetration50%
Repairable: steering gear50%
Bow section HP ƒ
Damage saturation pool for the bow: penetrations here deal their normal share until twice this much penetration damage has landed on the section (2 × 2,200 = 4,400), then further hits on it deal half damage. A penetration deals 0.33 × the shell's max damage; once the section is saturated it deals exactly half of that (0.5 × 0.33 = 0.165 × max damage), so a 3,000-damage shell's pen goes from 990 to 495. Overpens (0.1 × max damage) and citadels (1.0 ×) ignore saturation. Pens on the ship's other, unsaturated sections still deal the normal 0.33 ×. A larger pool keeps that part of the ship taking full damage for longer; a small one saturates fast and protects the ship's HP.
Casemate section HP ƒ
This section has no practical saturation cap: every hit here keeps dealing its normal share of damage (on most ships the citadel; on many destroyers the casemate).
Hull section HP ƒ
Damage saturation pool for the hull: penetrations here deal their normal share until twice this much penetration damage has landed on the section (2 × 12,800 = 25,600), then further hits on it deal half damage. A penetration deals 0.33 × the shell's max damage; once the section is saturated it deals exactly half of that (0.5 × 0.33 = 0.165 × max damage), so a 3,000-damage shell's pen goes from 990 to 495. Overpens (0.1 × max damage) and citadels (1.0 ×) ignore saturation. Pens on the ship's other, unsaturated sections still deal the normal 0.33 ×. A larger pool keeps that part of the ship taking full damage for longer; a small one saturates fast and protects the ship's HP.
Superstructure section HP ƒ
Damage saturation pool for the superstructure: penetrations here deal their normal share until twice this much penetration damage has landed on the section (2 × 1,400 = 2,800), then further hits on it deal half damage. A penetration deals 0.33 × the shell's max damage; once the section is saturated it deals exactly half of that (0.5 × 0.33 = 0.165 × max damage), so a 3,000-damage shell's pen goes from 990 to 495. Overpens (0.1 × max damage) and citadels (1.0 ×) ignore saturation. Pens on the ship's other, unsaturated sections still deal the normal 0.33 ×. The superstructure is not exempt: it saturates exactly like the bow and stern, so shells aimed at it stop dealing full damage once this pool is used up. A larger pool keeps that part of the ship taking full damage for longer; a small one saturates fast and protects the ship's HP.
Stern section HP ƒ
Damage saturation pool for the stern: penetrations here deal their normal share until twice this much penetration damage has landed on the section (2 × 1,500 = 3,000), then further hits on it deal half damage. A penetration deals 0.33 × the shell's max damage; once the section is saturated it deals exactly half of that (0.5 × 0.33 = 0.165 × max damage), so a 3,000-damage shell's pen goes from 990 to 495. Overpens (0.1 × max damage) and citadels (1.0 ×) ignore saturation. Pens on the ship's other, unsaturated sections still deal the normal 0.33 ×. A larger pool keeps that part of the ship taking full damage for longer; a small one saturates fast and protects the ship's HP.
These main guns are dual-purpose: they also fire at aircraft and feed the AA Defense card.
ModuleArtillery: 4×127 mm
Mounts / barrels4 mounts / 4 barrels
Reload timeInitial: 5 s → 4.5 s
Firing range (base)9.9 km
Firing range (top fire control)10.9 km
Turret traverseInitial: 11 °/s → 13 °/s
Turret armor20 mm
Turret traverse arcs ƒ
How far each mount can train, in degrees to either side of the mount's own facing. A rear turret with ±150° leaves a 60° blind wedge over the bow; one-sided arcs are wing mounts that cover a single side. The data does not say which way each mount faces, so the arcs are listed per mount without bow/stern angles.
Guns to bear ƒ
180° − 150° (the most restricted aft-facing mount's arc) = 30° off bow; 180° − 150° (the most restricted forward-facing mount's arc) = 30° off stern. How far off the bow (or stern) the ship must angle before every main turret can fire: the widest blind wedge among the rear-facing (or forward-facing) mounts, from each mount's trainable arc.
Shell Grouping (σ)2
Dispersion type ƒ
In practice: 25% tighter (better) horizontal dispersion and 25% less vertical spread at max range (10.9 km) than a standard destroyer: about 73 m wide × 44 m tall, against 97 m × 58 m. Also on this curve (4): Burrows, Christopher, Kane, Osborne.
Max Horiz Disp ƒ
Horizontal dispersion ellipse width at max range, from the dispersion model:
Max Vert Disp ƒ
Vertical dispersion ellipse height at max range:
Med Horiz Disp ƒ
50%-hit horizontal radius:
Med Vert Disp ƒ
50%-hit vertical radius:
Turret turn time ƒ
180 degrees / 11 deg/s traverse speed = 16.4 s.
Shells/min ƒ
Zero upgrades: 4 broadside guns x 60 / 5 s base reload = 48. All upgrades (top gun): 4 broadside guns x 60 / 4.571 s (4.5 s = 32 ticks) all-upgrades reload = 52.5.
HE shells
HE alpha2,150
HE Velocity792 m/s
Fire Chance9%
HE fire DPM vs T6 BB35334
Effective HE DPM vs T6 BB148209
HE penetration ƒ
21 mm ≈ 127 mm caliber / 6 (standard HE penetration ratio).
HE full-salvo alpha ƒ
2,150 HE damage x 4 broadside guns = 8,600.
HE DPM ƒ
Zero upgrades: 8,600 HE full-salvo alpha x 60 / 5 s base reload = 103,200. All upgrades (top gun): 8,600 HE full-salvo alpha x 60 / 4.571 s (4.5 s = 32 ticks) all-upgrades reload = 112,875.
Fires/min ƒ
Zero upgrades: 48 shells/min × 0.09 (9% fire chance) = 4.32. All upgrades (top gun): 52.5 shells/min × 0.09 (9% fire chance) = 4.72.
AP shells
AP alpha3,300
AP Velocity960 m/s
Min Ricochet60 deg
Guaranteed Ricochet67.5 deg
Fuse Timer0.01 s
Fuse Threshold21 mm
AP overmatch ƒ
floor(127 mm caliber / 14.3) = 8 mm (AP auto-penetrates plating this thick or less).
AP Pen Close ƒ
AP formula evaluated at muzzle velocity: .
AP Pen Far ƒ
Same formula at the ship's max firing range (10.9 km), where the shell has slowed to 363.9 m/s: .
AP full-salvo alpha ƒ
3,300 AP damage x 4 broadside guns = 13,200.
AP DPM ƒ
Zero upgrades: 13,200 AP full-salvo alpha x 60 / 5 s base reload = 158,400. All upgrades (top gun): 13,200 AP full-salvo alpha x 60 / 4.571 s (4.5 s = 32 ticks) all-upgrades reload = 173,250.
AP AOE Radius ƒ
AP shell over-penetration splash radius; scales with shell mass. Wickes 102mm = 3, standard 152mm CL ~ 20, Iowa 406mm ~ 270, Yamato 460mm = 400, Incomparable 650mm = 550 (max). Larger value = bigger splash damage area when AP over-pens.
ModuleTorpedoes: 533 mm quadruple
Launchers / tubes2 launchers × 4 tubes = 8 tubes
Reload time90 s
Projectile speed40.0 kt
Range8 km
Maximum simulated damage ƒ
Most targets only intersect one hull section, so a hit transfers about 1/3 of the warhead alpha (2/3 when the warhead blast >= 5000 and the burst reaches a second section). For this ship: . In battle, a hit on the torpedo belt deals the per-hit figure × (1 − the target's torpedo protection %), a bow or stern hit deals it in full, and a torpedo never counts as a citadel hit. This warhead's blast reaches a second section, so a hit lands as either a one-section hit (31,320 / 3 = 10,440) or a two-section hit (10,440 + 9,000 blast = 19,440, the ammunition figure), both before the belt reduction; the two-section hit is the more common outcome.
Maximum damage (ammunition) ƒ
31,320 warhead alpha / 3 + 9,000 blast = 19,440. Warhead alpha / 3 plus the blast addend: the per-torpedo damage figure. The 'Maximum simulated damage' row above applies target geometry to the same warhead. A two-section hit deals this before the belt reduction (see the row above).
Torpedo module damage ƒ
Per-torpedo module/blast damage parameter. Most torpedoes carry 500 to 2,000; ships announced by WG as dealing increased module damage carry 9,000 to 12,000, so their hits knock out engines, rudders, and turrets far more often. Comparative figure. The blast also widens the hit: these torpedoes land as either a one-section hit (alpha / 3) or a two-section hit (alpha / 3 + blast), the two-section hit more often; the Torpedoes card above gives this ship's two numbers.
Torpedo detectability0.9 km
Reaction time ƒ
How long a target has to dodge after your torpedo is spotted at its detectability range (lower means less warning): . 2.6855 converts knots to m/s on the game clock. Base value; commander torpedo-concealment skills lower it further.
Flooding chance ƒ
This torpedo carries a flooding-chance value of 1.9 per hit, shown as . Values above 100% are normal: in battle the base chance is scaled down by the target's torpedo protection (the Torp Reduction stat on its Survivability card) and any flood-resistance modifiers, so a value above 100% keeps flooding likely even through partial protection.
Torpedo launcher traverse25 °/s
Launch arcscentreline 270°
Torp Turn ƒ
Time to rotate the launchers 180 deg: .
Torp Arming137 m
Per-side salvo damage ƒ
One side firing, all torpedoes hitting: per-side tubes x per-torpedo simulated damage = 8 x 20,880 = 167,040. Each hit on the target's torpedo belt is reduced by its torpedo protection %. A one-section hit deals 10,440 instead (see Torpedo module damage).
AA mount points4
Maximum AA range ƒ
Longest-reaching family on the in-game AA card. Base AirDefense aura max range is 2 km; dual-purpose mount auras extend it.
20 mm Oerlikon Mk20Initial: 20 mm Oerlikon Mk.4 (4×1) → 20 mm Oerlikon Mk20 (4×2)
Gunsmain battery (DP)
Continuous DPS ƒ
Effective DPS in in-game units (raw aura damage × 3.5 × hit probability, summed per contributing aura) - matches the Close-range AA DPS headline's currency. Includes 63 from dual-purpose main battery firing as AA in this range band.
Range5 km
Guns20 mm Oerlikon Mk20
Continuous DPS ƒ
Initial: 11 × 3.5 × 0.95 = 37 → 18 × 3.5 × 0.95 = 60. Raw aura damage × 3.5 × hit probability, the same in-game units as the Close-range AA DPS headline.
Range2 km
Total DPS in Aura ƒ
Far 63 + Near 60 = 123
AA explosions ƒ
Each ~2 s salvo fires 2 AA explosions in quick succession, each leaving 1 cloud ahead of the attacking squadron - up to 2 clouds per salvo × 210 damage each. Planes that fly into a cloud take its damage; clouds dissipate before the next salvo lands. Defensive AA Fire, where fitted, multiplies the AA explosions within each salvo, and commander skills that raise the Number of AA explosions add to it.
Cloud damage ƒ
Damage a plane takes for flying into one flak cloud, before any reductions.
Cloud spawn chance ƒ
Every potential cloud spawns - the full pattern, every salvo. Often called flak 'hit chance', but spawned clouds always damage planes that fly into them - the roll is on spawning.
Salvo interval ƒ
A new flak salvo (the AA explosions above) fires roughly every 2 s.
Fired by ƒ
Flak keeps firing while at least one main battery mount is operational - even losing every dedicated AA mount does not stop it.
Flak zone ƒ
The activation band: flak fires while attacking planes are inside it. Clouds are placed ahead of the planes' path, so clouds can land short of 2.5 km or past 5 km - once planes get inside the band, new salvos stop. AA range bonuses push the outer edge out; the 2.5 km inner edge does not move.

Maneuverability
Engine power50,000 hp
Maximum speed35.0 kt
Turning circle radius500 m
Rudder shift timeInitial: 3.1 s → 2.7 s
Engine power-boost threshold7.0 kt
Engine spool-up time7.7 s
Reverse spool-up time3.8 s
Reverse speed ƒ
top speed / 4 + 4.9 = 35 / 4 + 4.9 = 13.7 kt. Base value; speed modifiers scale it.
Crash stop ƒ
Seconds from top speed to a dead stop after ordering full reverse: reverse power winds in over the reverse spool-up while water drag does most of the braking, using the ship's own reverse-power ratio. The full curve is on the acceleration chart. Full reverse stops about a quarter faster than a plain Stop order from top speed.
Engine boost threshold (reverse) ƒ
Speed below which the engine's built-in power boost applies in reverse.
Acceleration 0-90% ƒ
Time to reach 90% of top speed (31.5 kt of 35.0 kt).
Acceleration 0-99% ƒ
Time to reach 99% of top speed (34.6 kt of 35.0 kt). 99% rather than 100% because true top speed is asymptotic (thrust meets drag), so the last fraction of a knot is never quite gained.
Guns in a full turn ƒ
With the rudder hard over the hull turns 9.3°/s, so a target drifts across the bow at that rate. Turret traverse minus hull turn: 11 − 9.3 = +1.7°/s, so the guns hold the target through the turn. Main Battery Mod. 2 (+20% traverse) and Mod. 3 (−15%) move this line.
Detectability by sea ƒ
Base value, no camouflage. With a Grade IV permanent camo (or any disposable camo): 7.12 km x 0.955 = 6.8 km. Camouflage does not change detectability by air.
With Grade IV camouflage (sea) ƒ
Detectability by sea 7.12 km x 0.955 (Grade IV permanent camo or any disposable camo) = 6.8 km.
Detectability by air3.56 km
Smoke firing penalty2.65 km
Detect when firing (sea) ƒ
Larger of 10.9 km range and 2.65 km smoke firing penalty = 10.9 km. When you fire, you can be seen out to your main battery range. Skills that shorten your range don't shorten this below your smoke firing penalty.
Detect when firing (air) ƒ
Air detectability 3.56 km + gun-firing bloom 2.54 km = 6.1 km. The bloom tracks main-battery caliber 127 mm × 0.020 = 2.54 km.
Detect when on fire (sea) ƒ
Sea detectability 7.12 km + 2.0 km while burning = 9.12 km.
Detect when on fire (air) ƒ
Air detectability 3.56 km + 3.0 km while burning = 6.56 km.
Guaranteed Detect2 km
 Damage Control Party∞ charges · 40 s reload · 5 s active
 Smoke Generator2 charges · 240 s reload · 27 s emit / 121 s cloud active · 450 m radius
 Advanced Radar2 charges · 120 s reload · 10 s active · 8 km radar range
ƒ
Derived from the consumable's 30 m grid-unit range (km = grid units x 30 / 1000): ƒ
Derived from the consumable's 30 m grid-unit range (km = grid units x 30 / 1000): ƒ
The passive radar beam rotates at 18°/s -- one full Minimap rotation every ~20 s.ƒ
A ship caught by the passive sweep stays marked on the Minimap for about 2.5 s after the beam passes. Defensive AA Fire3 charges · 140 s reload · 25 s active · ×2 flak burst boost
ƒ
Repeats the flak burst pattern ×2 within each salvo - more clouds in the air over the salvo, at the same spots.